No one likes cleaning their oven, and with a build-up of food residue and grease, it can take a long time to get right. But it's a job you can't avoid for hygiene reasons. Here's our step-by-step guide to help you get your oven sparkling clean.
Essential Products
With such a wide selection of cleaning products on offer, it can be hard to know which ones are the best for you. To tackle oven cleaning, you need to ensure that the products that you use won't cause any damage to you or the oven. Chemicals found in some cleaning products can damage the interior of your oven by stripping away the surface from its natural coating.
It's much safer to go with a caustic-free product, as these still tackle stubborn stains but avoid any long-term damage to your kitchen.
When cleaning with caustic based products, ensure that you unlock windows throughout the house to ensure that it's fully ventilated and to avoid breathing in any harmful chemicals.
To give your oven a thorough clean, you will need:
- Oven cleaner
- Scourer
- Resealable plastic bags
- Sponges
- Rubber gloves
- Old toothbrush
Step 1: Getting Started
Cleaning an oven isn't a simple task, but if you wish to tackle it yourself, there are a number of steps you can take to make the job easier.
Before you make a start, make sure that the oven is off and cool. Protect any visible heating elements and carefully cover gas burner jets. It's also worth changing into old clothes, as oven cleaning can get rather messy. Wearing rubber gloves, remove any bits of food that you see lying inside the oven.
Step 2 : Shelving
Next, remove the shelves from the oven and soak them in warm, soapy water. The combination of hot water and washing up liquid will help to break down any burnt-on food and liquids. For the best results, leave the shelves to soak overnight.
If you are short on time, place the shelves in resealable plastic bags, spray with oven cleaner, seal up and leave the cleaner to work its magic. Ensure that you read the instructions on your oven-cleaning product and take all recommended safety precautions.
Next, spray or sponge the product into the corners of the oven, and leave the solution to soften any stubborn burnt-on food.
Meanwhile, use a scourer to scrub the oven racks clean. Turn them halfway through to make sure that they are clean on both sides. Rinse with warm water and set aside to dry.
Step 3: Inside The Oven
Oven cleaning products can take several minutes, if not hours, to take effect. Once the leftover food starts to loosen, take a damp sponge and wipe the inside of the oven. Be sure to repeat this step until the oven is clean, and rinse the sponge after each round to avoid spreading dirt. Don't get anything electrical wet – water and electricity don't mix well together!
If burnt-on food remains, fear not: sprinkle bicarbonate of soda on the charred food and leave to soften overnight. You should then be able to wipe the stubborn stains away the following day.
Areas of the oven that are often overlooked and equally difficult to reach are the corners. Tackle these hard-to-reach areas by scrubbing vigorously with an old toothbrush with the bristles having previously been soaked in either oven cleaner or bicarbonate of soda.
Step 4: Enamel Baking Trays
Baked-on grease can be a chore to clean, but with the right cleaning solution, it should be much easier. To bring your enamel baking trays back to their former glory, place them in a sink full of hot water and washing-up liquid. Scrub the grease away with a scourer and pat dry. Don't use a pot scourer on non-stick baking trays.
Boil some water and pour it into your sink, being careful not to scold yourself. Then add a cupful of bicarbonate of soda. Place your stain-encrusted trays into the sink and leave for an hour. This should be long enough for the solution to soften the burnt-on stains.
Next, clean the hob or range top with oven cleaner and wipe clean with a sponge.
Step 5: Glass Door
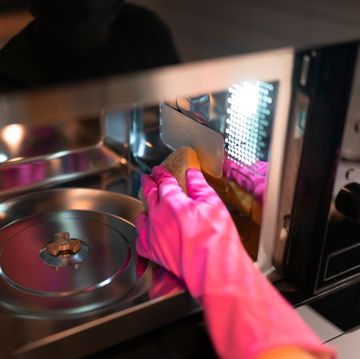
For the finishing touch, make sure that your glass door is shining clean. A glass scraper or scourer will help remove stuck-on food. Grease and oil can be tackled with a solution of hot water and oven cleaner. Don't use caustic-based oven cleaner on glass.
To prevent any unwanted puddles on your kitchen floor, place some old towels on the floor, under the gap between the oven and where the door opens.
Once clean, insert the glass door back into the oven and give the whole thing a wipe down, removing any leftover cleaning product or residue.
Self-cleaning ovens
Times and methods may vary between self-cleaning oven models, so it's important to make sure that you read the manufacturer's guidelines first. Ensure that the oven is empty before you start.
Then, simply turn on the switch to heat up the oven, and place it on the self-cleaning mode. Once the mode is complete, allow the oven to cool down. Once sufficiently clean, wipe the inside of the oven to remove any grime and grease that have been loosened.
Keeping your oven clean
Now that your oven is shiny and clean, here are some helpful hints on how you can keep it that way:
- Soak chrome shelves in soapy water or place in the dishwasher to remove any build-up of food.
- Leave bicarbonate of soda on top of stubborn stains overnight to remove stains.
- If your oven has a glass screen, make sure you clean it after cooking roasts, which may spit and leave fat residue behind.
- Before cooking, line the bottom shelf of your oven with foil or an oven sheet to catch any food that may fall.
- Roast fish and meat in cooking bags to cut down on the amount of fat that can spit inside the oven.
- Remove the tray from the oven, if you are checking how cooked it is, to avoid splashing grease inside the oven.
- Once you've finished cooking, place a heat-resistant bowl of water inside and heat the oven on a medium temperature for 20 minutes. Once fully cooled down, wipe the oven down with a damp cloth to help remove loose dirt and grease.
If oven cleaning is a chore you'd rather avoid, perhaps it's worth getting your oven professionally cleaned. The process is carried out at your home and takes around two hours to complete.
Visit Ovenu for more oven cleaning tips and advice.
Get inspiration, ideas and advice wherever you are! Follow us on Facebook: House Beautiful UK | Pinterest: House Beautiful UK | Twitter: @HB | Instagram: @housebeautifuluk
Olivia Heath is the Daily Editor at House Beautiful. Heading up all things digital, Olivia loves nothing more than uncovering tomorrow's biggest design trends and revealing the best tips and tricks to help you decorate your home like an interior designer. Week by week Olivia shares the most stylish high street buys to help you get the look for less (while compiling her very own, and rather lengthy, homeware lust list) and showcases the best makeovers (who doesn't love a before & after?), as well as the hottest and most unique properties on the market.
Prior to making the switch to interiors on House Beautiful, Olivia worked at Reveal magazine, where she reported on celebrity and entertainment news by day, and attended showbiz parties and red carpet events by night! Olivia has an MA in Journalism with an NCTJ qualification, as well as a BA in Journalism and Media & Cultural Studies.


